Building a Craft Sewing Room in Our RV
We live Full Time in a Fifth Wheel Toy Hauler RV, which makes crafting a challenge, we finally came up with a great solution!
This is how we converted our Toy Hauler Garage into an office space crafting area and sun room.
After removing the NSF shelving that held our business, (a Kitchen Under Canvas), for the past three years we were left with a 14 foot by 8 foot area.
Thankfully, we had taken the time when we had built the shelving, to line the walls with Masonite to protect the walls from our cargo shifting while in transit, which we now set about taking off the walls to reveal windows and allowing us to open the pass through door between the living quarters and the garage.
Once the Masonite was removed I gave the rubber diamond plate flooring a good scrubbing down. It was a challenge, but having a washable rugged surface had served us well and would also serve us well when we started making a mess while crafting.
Note the large roll down screen at the back ramp entrance, we played with the idea of leaving the back open so we could use the ramp as a deck, (see ramp as deck in picture 3), but in the end we decided to close off the back door to make room for more storage type furniture to hide all of our crafting tools and supplies.
Picture 3 shows the initial layout of the main crafting table on the left making the most use of the usable space and still keeping the side screen door accessible.
 We
played with various layouts until we came up with picture 4. I went on
Craigslist and found the wicker dresser and wardrobe for $60, they threw
in a twin sized bed and a large dresser mirror to boot.
We
played with various layouts until we came up with picture 4. I went on
Craigslist and found the wicker dresser and wardrobe for $60, they threw
in a twin sized bed and a large dresser mirror to boot.I re listed the mirror on craigslist for $25 and we used the bed in our new cargo fifth wheel in the loft for us to sleep on when we needed it on the road.
 I
used a plastic kitchen table for my crafting desk temporarily, I was
stunned at how much crafting tables and sewing tables were going for,
even on the net. No way was I going to pay three hundred dollars for a
particle board table with drawers, I had to find another solution.
I
used a plastic kitchen table for my crafting desk temporarily, I was
stunned at how much crafting tables and sewing tables were going for,
even on the net. No way was I going to pay three hundred dollars for a
particle board table with drawers, I had to find another solution.The plan called for two crafting areas actually, a crafting desk to make jewelry and to work on watches and also a crafting table that I could lay out leather or material on for patterning and also a place to set up my sewing head.
We found the best of both world in a drop leaf dining table I found on Craigslist for $65, that was solid cherry wood and had the ability to fold down when not in use, or fold out when laying out projects.
Below we have the finished area, we added a lighted bamboo lighted showcase for $70, it has storage below and was a bit frivolous, but it looked perfect for our area and we just had to add it. Doyle's Dobsonian Telescope takes up the back left corner, it acts as a futuristic piece of sculpture in between star scanning sessions. I had the suitcases on top of the wardrobe for ages and they fit the space perfectly, I also dug out my antique wind up mantle clock I have had for 40 years and set it ticking and chiming away on the wicker dresser. The large mirror is temporary, it's on the net for sale and it just fits there for now. All of the other accessories I had in storage here and there in the rest of the RV, had fun digging them out and putting them to use, including the cute little shell lamp on the dresser.
 |
| Finished Room. It's wonderful to have an area I can work and enjoy myself in! |
I have to admit I toyed with the idea of keeping it a garage and keeping a golf cart in it, but we decided we would be better off with more living space and crafting area.
After removing the masonite we were able to open up the pass through door that had been sealed shut since the day we had bought our Road Warrior three years ago.
 Also,
I have to say I got a big kick out of the BIG windows that Heartland
was wise enough to install giving us lots of light and a great view!
Also,
I have to say I got a big kick out of the BIG windows that Heartland
was wise enough to install giving us lots of light and a great view!Note the open cabinet next to the door, it's all wired up for a flat screen TV, which we will be adding later...to the right of that is a large storage cabinet that we had removed the doors of so the shelving would fit flush against the bulk head. These will be added back on when we get our storage moved down from Wisconsin.
Also the blinds for the windows and other sundry hardware are languishing up north in storage for the time being, so I'm not going to worry about window treatments for now, just having the space re purposed is good enough for me for now!
Next is a picture of a "Trial Fitting" of various furniture configurations using spare furniture we had on hand. We jocking these items around a few times to get a good feel of the flow and usefulness of various items.
Finally we came up with this layout, I found a 70's black lacquer and brass office desk for $50 on Craigslist that features a plate glass top and a velvet swivel rocking desk chair. So instead of paying $300 for a generic, sterile crafting cube with no seating, I have a very stylish desk with plenty of drawer storage for tools and supplies that has a classy look that ties in the black theme of the living area through the door nicely.
The cherry wood table also matches the cabinetry of the entire trailer, which is also solid Cherry. Very classy. The two white wicker swivel chairs were a leftover from another plan we had for our screen house in the yard, they were great placeholders for now, I have thrown them on the net for what I paid for them and they will be replaced by the backless saddle stools you can see stashed under the table for now, they will be more practical and save space, I paid $5 bucks for the set of three.
When I have my sewing head set up on the drop leaf table I will just roll my desk chair over to use when I am doing intensive sewing projects, otherwise the stools will be fine for those small, short lived projects.
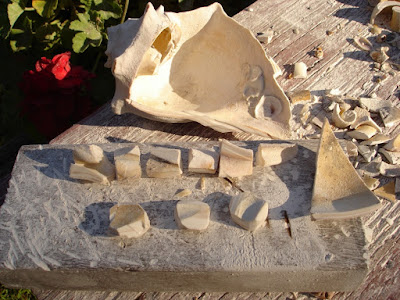
What's also nice about this layout is that my husband Doyle will be able to utilize the drop leaf table for his projects also, he prefers to work outside since most of his shell carving involves dust and such, but for the finer and more delicate carving on rainy days, he will be able to use this area without interfering with my jewelry making, etc.
This are also makes a great sun room, we find ourselves gravitating to this area in the morning for our am coffee, it's open, airy look and the ability to open windows and doors to let the breeze play through make this the ideal four season room in Florida.
So Crafty Folks, this is why a Toy Hauler can be a Crafter's best friend, not all garages have to have "Toys" in them. you can make it the best living space in your house!
Making Good Jewelry Even Better...Remaking an Boring Piece for Etsy
 |
| The Remade Piece, a real showstopper and a more cutting edge design! |

Left is pictured another example of a piece of jewelry that just wasn't doing well on Etsy...in a word, it was BORING. It was simple and elegant, but not unlike many thousands of other pieces offered by other sellers for much less.
So, back to the drawing board, I took it apart and redesigned the cocktail length into a more choker or bib type, then added the graduated pieces as charms instead of to the single length.
 |
| Back to the Design Drawing Board! |
Balance is all important in designing a necklace like this, if you put too many pieces on one side, it may look OK, but the necklace will be constantly sifting to the heavier side, making of a very unhappy wearing experience.
 |
| The finished design, beautiful! |
 |
| A matching charm bracelet! |
After all, this is a very original and unique piece, it would be very hard to accessorize and you may loose a sale because a customer has nothing to wear with it to coordinate.
I always list my matching components separately so they are an option and may very well be and extra sale, this way the customer has choice and I have more variety and options in my listings.
 |
| And... of course, earrings! |
You also will have learned a thing or two about making jewelry and the latest trends, so don't be afraid to give that old piece a new shine by taking it apart and giving it a new lease on life!
By the way, this new piece is offered in my Etsy shop HERE, along with the matching bracelet and earrings.
Here is another necklace I remade earlier this year, the article on rebuilding it is HERE.
 |
| The Hot Mess Itself - Bow Wow! |
Subscribe to:
Posts (Atom)


